
Cloth pantiliners from scrap fabric
If you were to look at my academic record, you might suspect that I went after the least practical degrees on purpose. I didn’t: I just have impractical interests. Along with having a degree or two in English, I have a minor in theater arts — costume design. I used to make fairly elaborate Renaissance costumes. Now I hem, mend, and sew cloth pads. How far the mighty have fallen!
I mostly now use menstrual cups, which are less messy and lower maintenance than cloth pads, but I still like my mini cloth pantiliners from Mimi’s Dreams and don’t regret jumping off the disposable pantiliner bandwagon. I wanted a few more and have lots of fabric scraps kicking around, so I decided to make some for myself. I tried out a few different patterns, and came up with my favorite.
So, here’s a little tutorial on making your own cloth pantiliners. They’re fairly quick and easy to make. These are tiny, thin, unobtrusive daily liners or light cup backup. You can make wider, thicker versions for cloth menstrual pads.
You will need:
- Smallish amounts of fabric (OK to use old towels, the ugly flannel shirt you were going to get rid of, other things you have lying around the home). More detail later.
- Thread. I like matching it to the fabric, but to be green, I should say: use whatever you already have.
- Pins. Not the safety pin type.
- Some type of closure. I like sew on snaps. There are also ones you can hammer in, buttons, and (if you really must) Velcro dots.
- A sewing machine. The thicker the pad, the stronger your sewing machine should be. Lightweight is fine for these pantiliners.
- An iron, preferably with good steam power. Ironing is not optional when it comes to sewing. Sorry.
- Bandaids if you’re new to sewing and prone to klutziness. Pins are sharp and irons are hot. But I hope you won’t need those.
Step 1. Find or make your pattern.
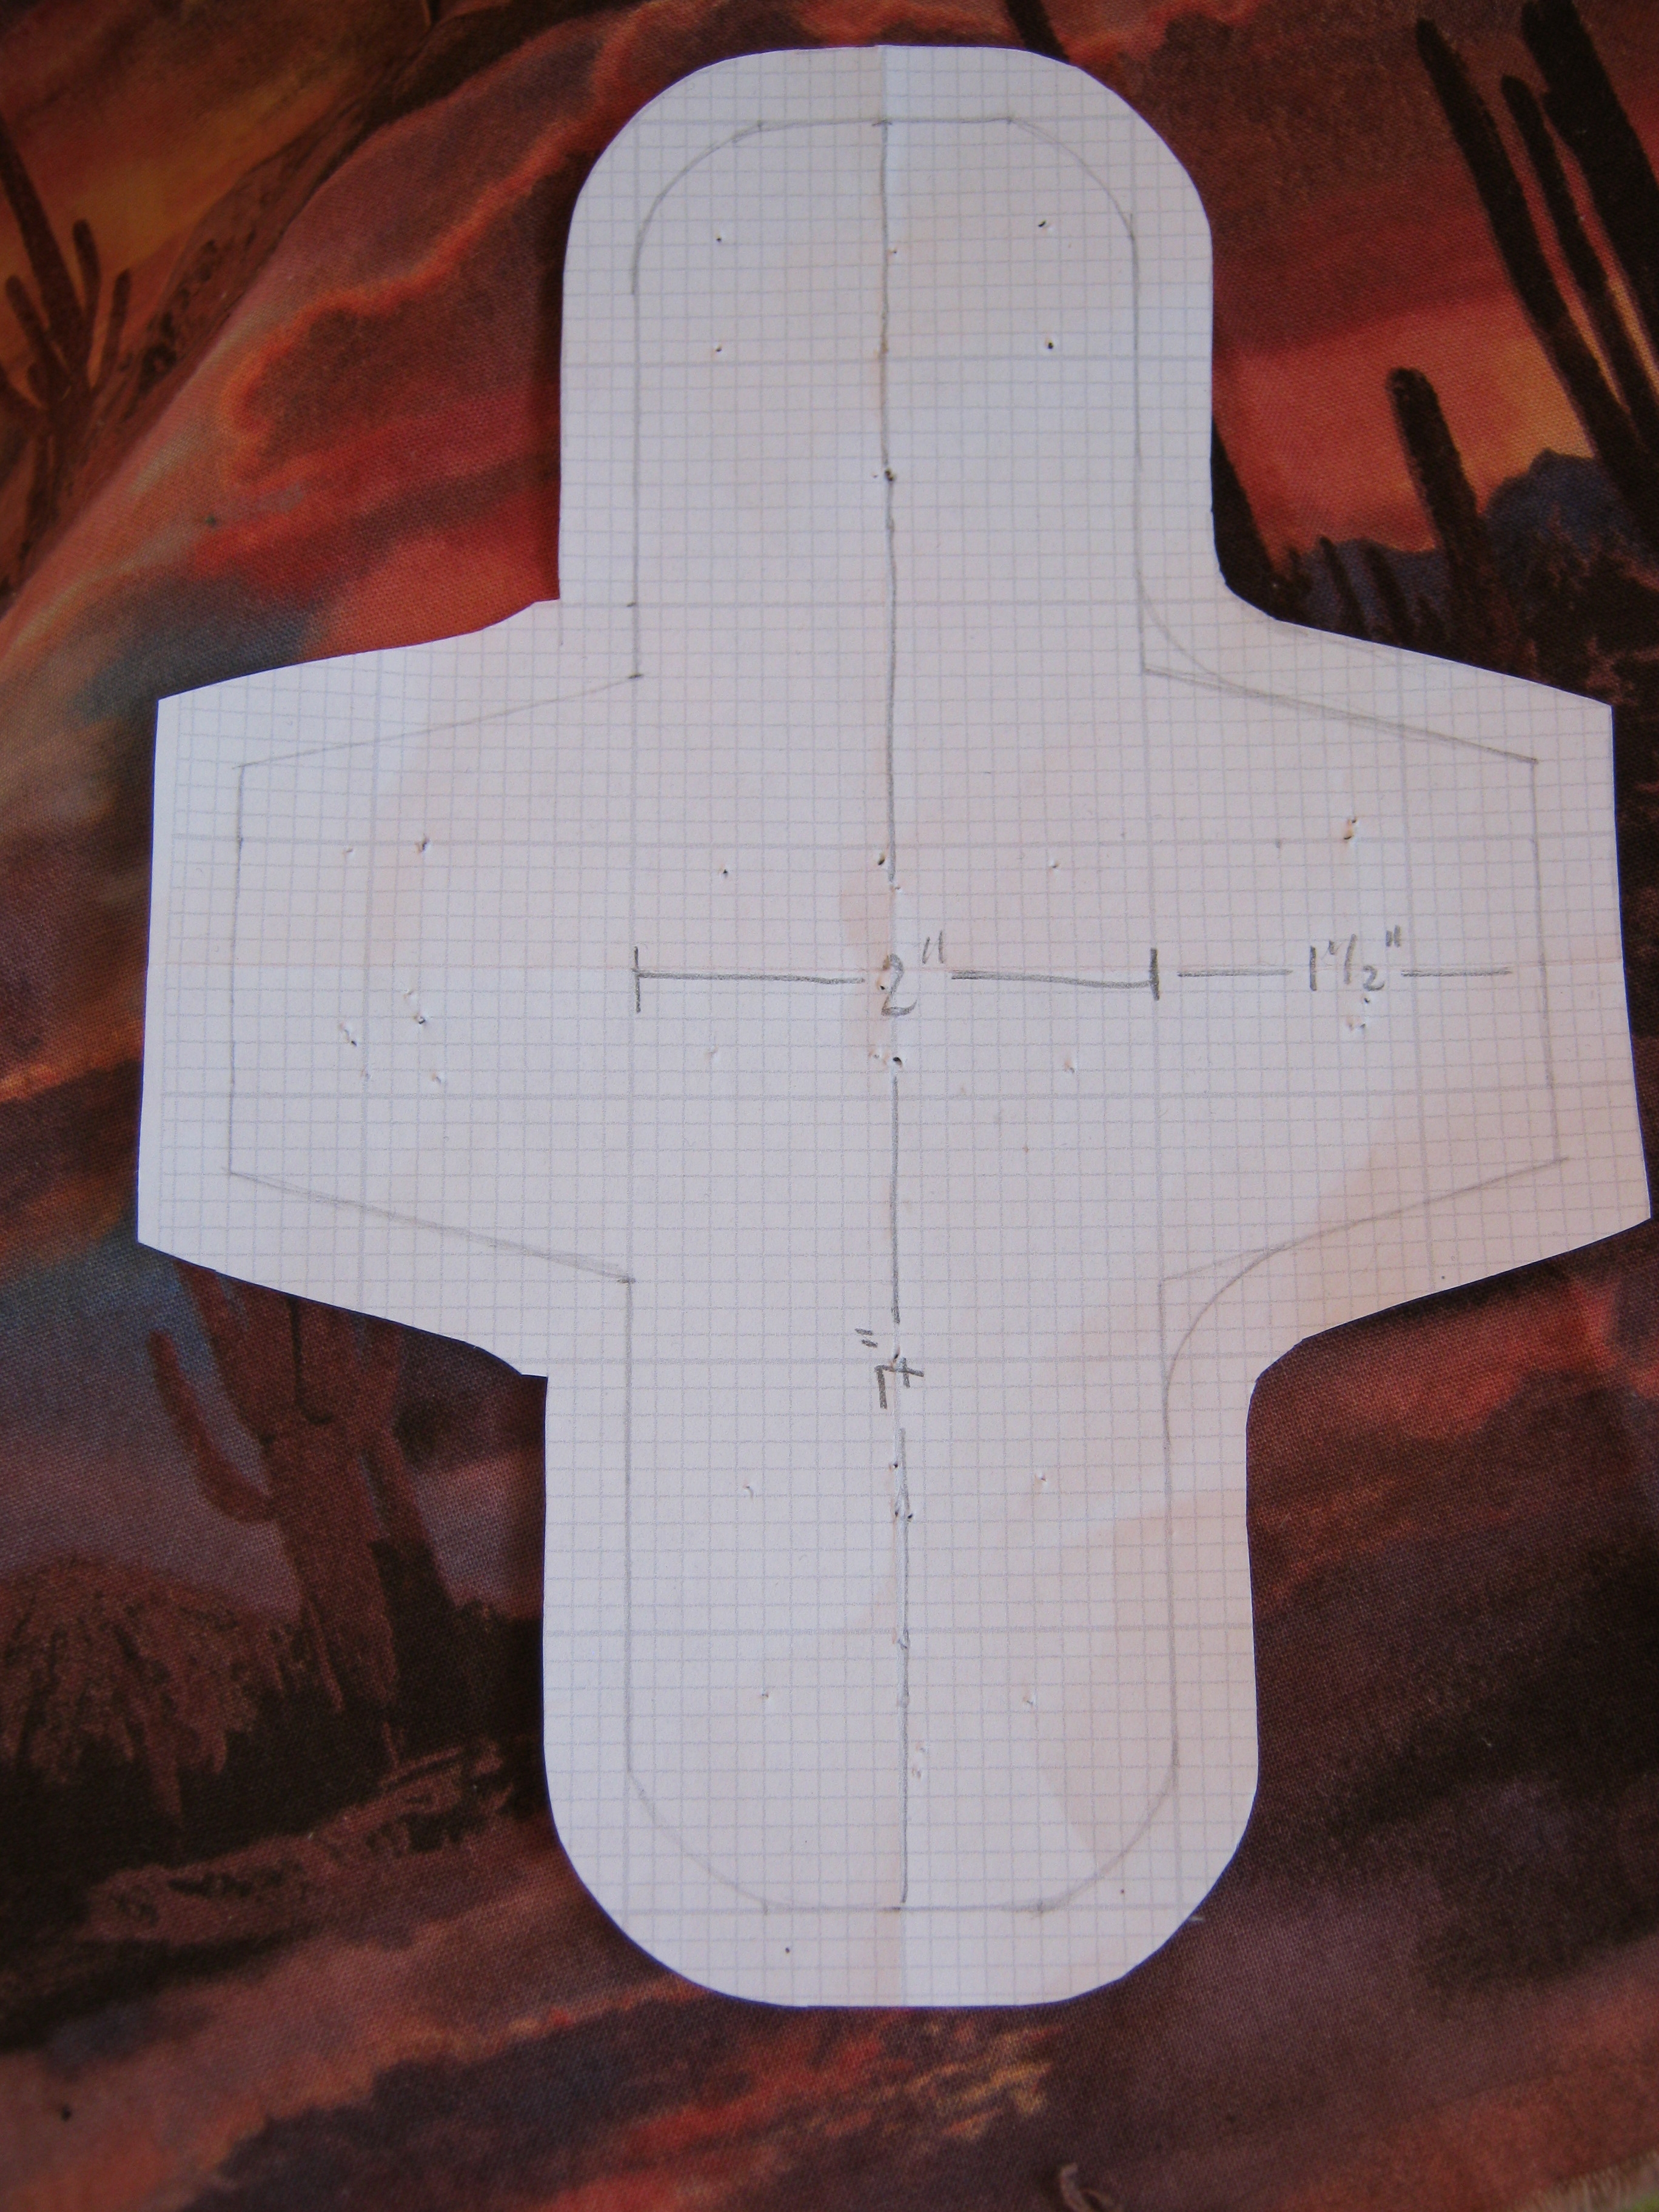
There are lots of free patterns out there. You can also trace a disposable pad or make your own pattern. I knew I wanted something a little narrower and thinner than my Mimi’s Dreams minis, so I used graph paper to draw a pad that was 7″ long and 2″ wide, with 1.5″ wings (they need to be long enough to overlap by 1/2″ – 1″). This is tiny, by the way — most pads are 2.5″ across and often much longer. Then I added seam allowance to all sides, folded it in quarters so it would be symmetrical, and cut it out. If you make a pattern like this, be sure to have a 2″ straight edge that you can leave open to turn the pad inside out later. I’m using the side of one wing.
The insert pattern is just the pad without the wings or seam allowance (2″ x 7″, in my case). Depending on what fabric you use and how much absorbency you want, you may want more than one layer of the insert.
Step 2: Get your fabrics together.

Cactus print cloth pantiliners!
Cloth pads usually have three layers:
- a top layer of something soft and absorbent, like a cotton flannel or quilter’s cotton
- an absorbent core (cotton flannel, terry, natural fleece)
- a moisture resistant or moisture proof backing, like polar fleece.
You don’t need very much fabric. About 1/4 yard of each will yield 5+ liners. I’m using a quilter’s cotton on top that was scrap from a friend’s project. (I realized only after cutting that a cactus print might not be entirely appropriate for its intended purpose.) The core is from a 1/4 yard cut of cotton flannel sheeting. The back is a black synthetic suede that is thinner than fleece yet offers some moisture resistance.
Wash, dry, and iron all your fabrics on the highest / hottest settings you are likely to ever use on your cloth pads. Even though I line dry 90% of the time, there are days on which I want (or need) clean liners now and send them through the dryer. Do not skip this step! Your cloth pads will warp.
Step 3. Cut out your fabrics.
If you’re testing out a new pattern, I would just make one, but it saves time to cut multiples out. Make sure your pattern is parallel with the selvage (the finished edges of the fabric), pin, and cut carefully around your pattern. You can also trace it and cut on your tracing lines instead.
For a thin, everyday pantiliner, I use two layers of flannel for the core, so cut two of the inserts for every one of the top and bottom layers.
Step 4. Sew the insert to the top layer.

Be lazy: sew straight lines!
Pin and sew the insert to the wrong side of the top layer. Some people sew ovals or squigglies. Sewing tight curves is a pain, so I just stitch two lines on the edges of the insert. Tip: if you sew in the same direction for both lines, you’re less likely to get wrinkles in your insert.
Iron.
Step 5. Sew the top and bottom layers together.

More pins.
Pin the top and bottom layers together, wrong sides facing. (Lots of pins. Fabric likes to shift on you when you’re sewing.) Now sew the sides together, leaving at least a 2″ gap on a straight edge somewhere for turning.
Iron and then clip the curves (both concave and convex). Otherwise they won’t look nice or lie flat when you turn everything inside out.

Clip those curves. The right wing has been left open for turning.
Step 6. Turn everything inside out.
This is the most miserable part of the process, because you’ll end up with something limp and misshapen and begin to think that paying $4 for a cloth pantiliner is a good deal. Plus it’s easy to not leave quite enough space to turn and have to wrestle with it. (2″ is the absolute minimum — the thicker the pad, the more you’ll need.)
Use your fingers or a tool to press the seams open, and then iron with lots of steam until it looks presentable.
Step 7. Topstitch around the whole thing.

If you want the finished product to look nice, go slowly on this step. I manually adjust the foot around the curves because my current sewing machine has only two speeds: 0 and a whole lot faster than I want to be going. Be sure to tuck in and sew over the seam that you left open to turn the thing inside out.
Lines a little crooked? Oh well. It’s only underwear.
Step 8. Attach some sort of fastening.
I like sew on snaps, but you could also do buttons or some kind of tab closure. All done!
You can read about my earlier adventures in cloth pads here. I think having some basic sewing skills is quite green if you want to be able to mend old clothes or make new things out of scrap fabrics.
Do you use cloth pads or liners? Have you tried making your own?


